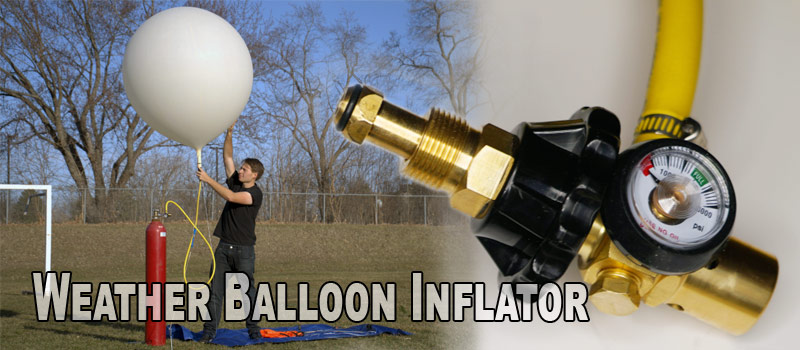
Our Weather Balloon Inflator allows you to safely inflate your weather balloon very easily, the inflator has a regulator that reduces the helium tank pressure from 3,000 psi to 80 psi, this ensures that you won’t blow your balloon up. In addition, they have a filter that prevents any impurities/dust going into your balloon. The 5ft long air hose is kink resistant and is rated for temperatures from -40 to 140 degrees F!
Features
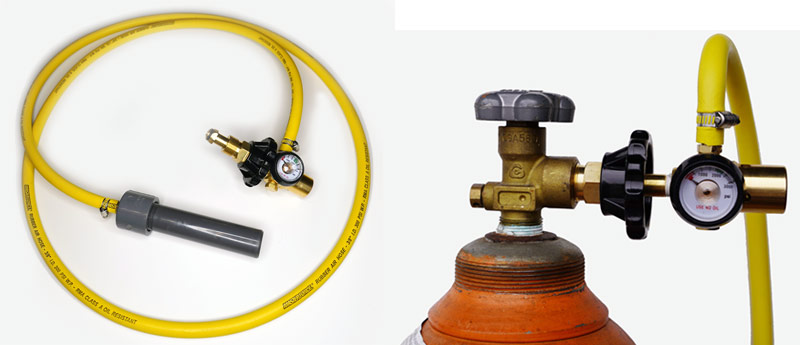
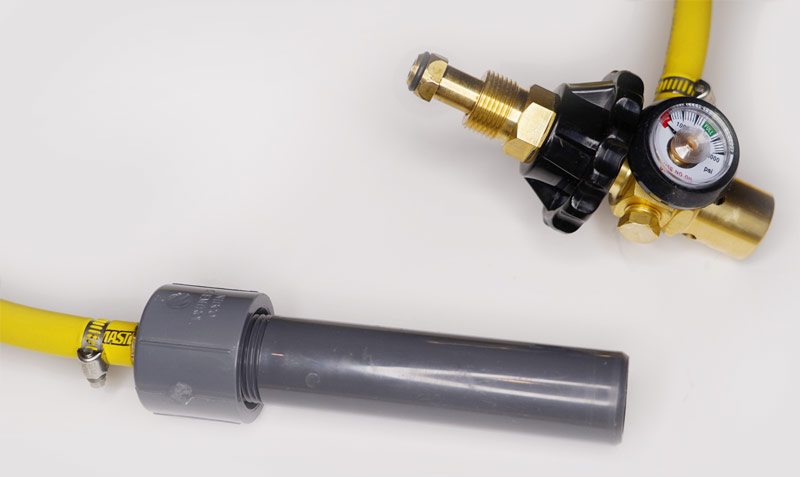
- Hand tight connection, no wrench needed!
- Included gauge to see helium tank pressure
- 3,000 psi to 80 psi regulator
- Rubber gas cylinder mate seal
- 5” long PVC Plastic tubing perfect for filling any size weather balloon
- All-brass gas fittings
- Built in gas filter to prevent dust in tank going into balloon
- Kink Resistant 3/8”
- CGA-580 fitting
Choose the hose length between 5ft and 10ft long, a longer hose allows for the helium tank to lay on the ground, or have the tank farther away.
| Weather Balloon Inflator with 5ft Long Hose… $89.99 |
| Weather Balloon Inflator with 10ft Long Hose… $105.00 |
Here’s how we recommend filling your weather balloons:
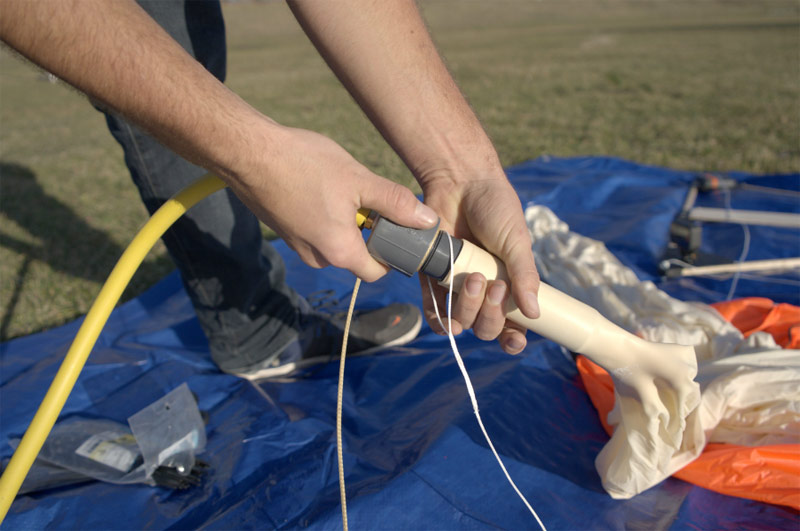
- Attach the inflation system to your helium gas cylinder, a hand tight seal will be more than adequate, as brutal force with a wrench could damage the seals.
- Insert the inflation system nozzle into your weather balloon’s neck. Do not unroll the weather balloon yet. It is much easier to work with the balloon’s neck when the balloon is still rolled up.
- Secure the weather balloon to the inflation system nozzle. Wrap both the neck of the balloon and the bottom of the inflation nozzle together with electrical tape.
- Unroll the balloon and prepare it for inflation. Before you start to inflate your weather balloon, have your helper hold the balloon loosely over their forearms.
- Slowly open the valve on your helium gas cylinder to begin inflating your balloon.
- Let the balloon lift itself out of your helpers forearms. Eventually the balloon will rise out of your helper’s arms. You can now start measuring your balloon’s lift.
- Inflate your balloon until it has the right amount of lift. When measuring your balloon’s lift, make sure there is slack in the inflation hose. You want all of the balloon’s lift to be pulling up on the scale, not the inflation hose. You want all of the balloon’s lift to be pulling up on the scale, not the inflation hose. Don’t forget to add the weight of the inflation nozzle to the reading on the scale. The inflation nozzle weighs 200 grams, so if your scale measures a lift of 800 grams, your balloon is actually generating 1,000 grams of lift (measurement on scale plus the weight of the inflation nozzle).
- Once your balloon has the right amount of lift, shut off the supply of helium.